Do Motherboards Have Integrated Graphics?
Do motherboards have integrated graphics or do you need a integrated graphics chip or a dedicated GPU? This article will tell you all about it.
The motherboard is the hub to which all of your major computer components are attached and subsequently powered by. Your PSU connects your motherboard to power, and the motherboard distributes that power to the rest of your components.
As such, if your motherboard is having issues distributing power, your system won’t function properly. In this scenario, you’ll want to know how to test the motherboard without a CPU. Testing without a CPU allows you to narrow down whether the problem is with the motherboard or the CPU, which allows you to troubleshoot more efficiently.
In this article, I’ll discuss why and how to test a motherboard without a CPU, as well as the following steps for testing the motherboard:
After reading this article, you should be able to test your motherboard without a CPU and troubleshoot accordingly. Let’s get into it.
There are a lot of different components that go into making a system fully operational. Your CPU needs to be powered and temperature-regulated. Your GPU needs power and direction from the CPU. Your fans need to be running to keep the system cool.
The center of all of this is the motherboard. By removing all of the components from the motherboard and testing whether or not it is receiving power, you can determine whether the issue lies within the motherboard or, if there are no red flags, which components to test next to determine the source of the problem.
To test your motherboard without a CPU, follow the steps below. You can test motherboard functionality by removing it from the case or leaving it in, but the basics remain the same either way.
The first step is preparing your motherboard for testing. Before anything, power off the computer and unplug the PSU from the wall. You’ll want to remove as many components as you can, such as CPU, GPU, and RAM. You can either remove the motherboard entirely from the case or leave it where it is to test it.
At this point, you’ll also want to check if your motherboard has small LED lights (see also best LED lights for a gaming room) laid throughout the board and if it has a small beep code speaker. If you are unsure what to look for here, consult your motherboard manual.
If you remove the motherboard for testing, make sure that the motherboard is set on an anti-static mat or, at the very least, on a piece of cardboard. Avoid setting the motherboard near or on metallic surfaces, as this puts your motherboard at risk of electrostatic discharge, which will ruin the motherboard.
If you leave it in the case, you can skip to Step 3. If you remove it, you’ll have to disconnect its power supply first, in which case you’ll want to follow Step 2 to reconnect the power.
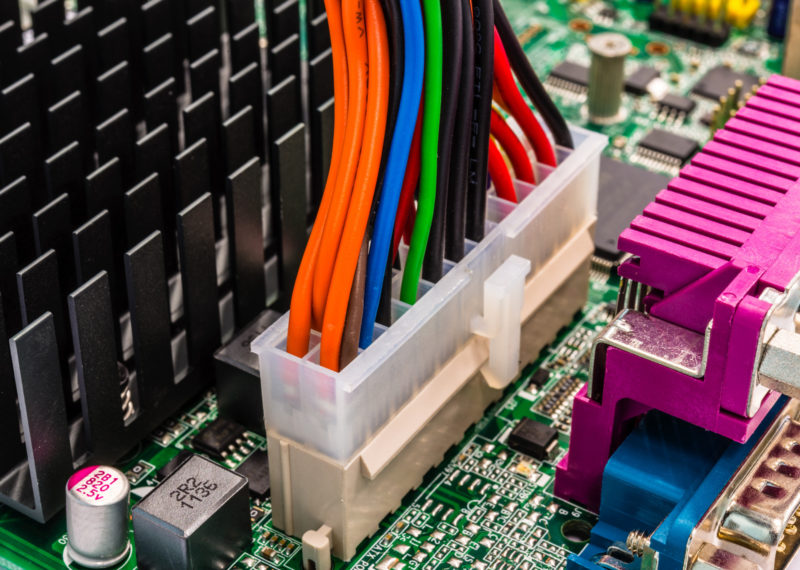
Before testing, you’ll need to reconnect the power supply to the motherboard. These will be the same two connectors that you disconnected to remove the motherboard. It will be the 8-pin power connector for the CPU and the 24-pin connector for the motherboard.
Once you have these power connectors attached, proceed to Step 3.
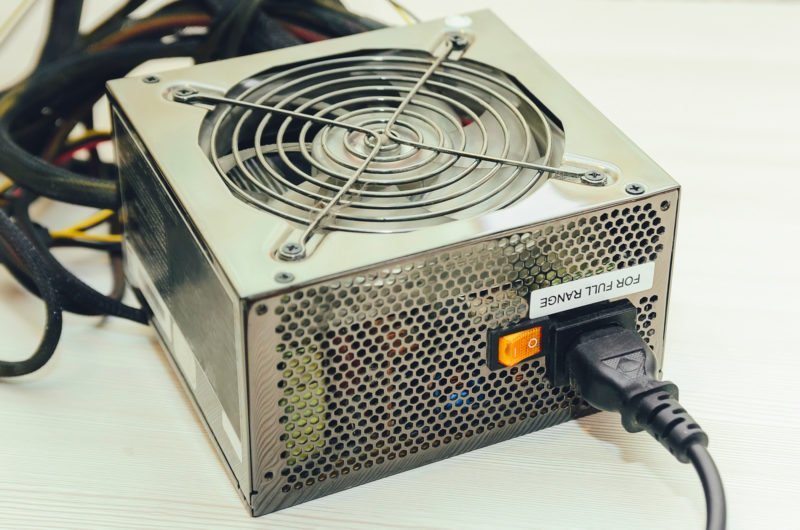
Now that the other components are removed and your motherboard is connected to your PSU via the power connectors, you can plug the PSU into the wall socket. Be sure to place your PSU on a non-conductive surface and make certain that you are grounded before proceeding.
Plastic shoes or slippers and non-conductive gloves are advised to avoid electrostatic discharge exposure.
You might also be interested in this article about the best PSU brands.
Now that the motherboard is ready for testing, it’s time to power it on. Turning on the motherboard requires different methods, depending on whether or not you removed it from the case for testing.
Powering on the motherboard from inside the case is a relatively simple process. You’ll need to find the Power Switch Pins on your motherboard, which are generally located on the Front Panel Header. If you are having trouble finding these, consult your manual or search for photos online.
Then, you’ll need to locate the Power Switch Jumper, which is a part of your case and make sure that’s connected to the Power Switch Pins. This may already be connected, but double-check that these two requirements are met before powering on the motherboard.
Once you’re certain the Jumper is connected to the Pins, you can press the power button on your case to turn on the motherboard. Proceed to Step 5 to decipher the results.
A majority of newer motherboards will have a manual power button located on the board itself. If this is the case with your motherboard, you can simply press that button and proceed to Step 5.
If your motherboard is older, you’ll need to either connect the Power Switch Jumper to the Power Switch Pins, as outlined above, or manually jumpstart the pins using a screwdriver.
If doing the former, make sure your motherboard is close to the case, attach the necessary jumper, and power on the motherboard using the case power button.
If you’re jumping it with a screwdriver, use a flathead screwdriver to touch the two Power Switch Pins that you would connect the jumper to. Make sure you aren’t touching any other pins in the header to avoid any damages.
It’s recommended that you just use the Power Switch Jumper included in the case if yours has it. The risk of using a screwdriver is one you should avoid if possible.
Now that your motherboard is powered on, a variety of things might happen. First, nothing will appear on your screen. This is because there is no CPU or GPU (see also the best CPU GPU combination) attached to display anything from. Then, you might see either LED flashes on the motherboard or hear beep codes sounding from the motherboard’s speaker.
Read the pertinent sections below to understand their meanings.
To hear beep codes, your motherboard will need a beep code speaker. Often, newer motherboards have this built-in to begin with. Older or budget motherboards might not, in which case you can invest in a small beep code speaker to attach to the motherboard.
There are a variety of beep codes that will play that dictate where the problem lies. The most common three are:
Since you disconnected the memory and CPU, you might hear the one beep or five beep messages playing. However, if you hear the 2 beep message, it means that something is wrong with your motherboard.
Every motherboard with LEDs has a guide in its manuals that outlines the meanings of the flashing. If your motherboard’s LEDs are flashing when testing, there could be an issue that your motherboard is trying to notify you of.
Consult your manual to decipher the meaning of the flashes, remembering that any light indicating an issue with a component you removed can be expected.
If your motherboard has neither LEDs nor a speaker, you can still test its functionality. The easiest way to do this is by connecting either the CPU fan to its header, or by connecting the case fans to the SYS_FAN header on the motherboard.
Power off the system before connecting these, then power it back on. If the fans run off the motherboard’s power supply, it means that the motherboard might be fully functional. However, you won’t be able to detect if the problem lies in a different part of the motherboard with this method.
The best thing to do if you are still worried about the motherboard’s functionality is to purchase a beep code speaker and decipher the codes.
In this article, I walked you through how to go about testing your motherboard without its speaker. There are a variety of different ways to do this, but make sure that regardless of which method you use, you have a manual handy and keep all components away from potentially charged surfaces.
When you purchase through our links, we may earn an affiliate commission at no additional cost to you.